Unlock the secrets to effective concrete bollard installation with our comprehensive guide! From initial site evaluation to ensuring proper curing, mastering these best practices is essential for creating sturdy, secure barriers that stand the test of time. Read on to discover the step-by-step process that guarantees your concrete bollards deliver optimal stability and safety for your property!
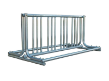
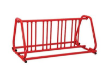
Maximize your community's cycling potential by understanding the critical role of spacing and layout in bike rack installations! Our article delves into how thoughtful placement can enhance accessibility, safety, and user experience while optimizing parking capacity. Discover the best practices for creating an efficient bike parking system that meets the needs of cyclists in your area!
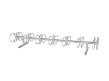
Enhance your property’s cycling appeal by ensuring your bike racks are accessible to all users! Our article provides essential best practices for commercial bike rack installation, focusing on ADA compliance and effective design strategies. Discover how to create an inviting and functional bike parking experience that meets the needs of every cyclist in your community!
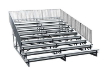
Is your commercial bike rack showing signs of wear and tear? Understanding when to replace or refurbish your bike racks is crucial for maintaining safety and aesthetic appeal in your space. Read on to discover key indicators of damage and learn how to extend the life of your bike racks while ensuring they continue to meet the needs of cyclists!